
I’m very honored to be participating in the 2016 Cloud 9 New Block Blog Hop hosted by Yvonne@Quilting Jetgirl, Cheryl@Meadow Mist Designs, and Stephanie@Late Night Quilter 9/12-9/14/16. Our three hosts curated the most beautiful bundle of Cloud 9 Organic Cirrus Solids. It is called “Berry Harvest” and is made up of five scrumptious colors: Amazon, Sky, Shadow, Lilac, and Iris. Cloud 9 generously supplied each participant a Berry Harvest fat quarter bundle. All of the 12 1/2″ unfinished blocks made for this new block blog hop will be collected and made into quilts for donation. Yvonne’s group got this blog hop going yesterday. If you have not already checked out their wonderful blocks, you will truly be inspired.
I am in the second group of bloggers, and Cheryl is the leader of our group. At the end of this post are links to all the other bloggers in my group. I hope you can take some time out to enjoy all the blocks created by our group.
I’m calling the block I have designed for this new block blog hop “Berry Blossom.” The inspiration for this block is the Dogwood Blossom Mini Barn Quilt Kit. Terri Ann’s mini barn quilts are such a great and economical way to add a little three-dimensional quilt art to any decor.
For my Berry Blossom block, I used all five colors of the Berry Harvest bundle.

Cutting
From the Iris (berry colored) fabric, cut one 4 1/2″ strip and then subcut: two 4 1/2″ squares, four 2″ squares, and two 1 1/2″ by 2″ rectangles.
From the Lilac (pink colored) fabric, cut one 4 1/2″ strip and then subcut: two 4 1/2″ squares and two 4 1/2″ by 2″ rectangles.
From the Shadow (grey colored) fabric, cut one 3 1/2″ strip and two 2 1/2″ strips. From the 3 1/2″ strip, subcut four 3 1/2″ squares. From the 2 1/2″ strips, cut twelve 2 1/2″ squares.
From the Amazon (turquoise colored) fabric, cut one 3 1/2″ strip and one 2 1/2″ strip. From the 3 1/2″ strip, subcut four 3 1/2″ squares. From the 2 1/2″ strip, subcut four 2 1/2″ squares.
From the Sky (light blue colored fabric), you just need one 1 1/2″ by 1 5/8″ rectangle. I recommend cutting a 2 1/2″ strip, then sub-cutting the rectangle and having a more usable scrap of fabric for another project.
The photo below shows all the different fabric cut in the required dimensions.

Marking
Next you will mark the four 3 1/2″ Shadow squares, four 2″ Iris squares and eight of the twelve 2 1/2″ Shadow squares with an erasable or a disappearing ink marker with a diagonal line as shown below:
Sewing
Sew all seams with an accurate 1/4″ seam.
Center Unit
Let’s start sewing the center unit. Place a 2″ Iris square on the left edge of one 4 1/2″ x 2″ Lilac rectangle, pin, and sew on the diagonal line as shown below. Then sew the other 2″ Iris square on the other side of the rectangle. You will need two of these. Trim the Iris squares 1/4″ from the sewn seams. Press open.
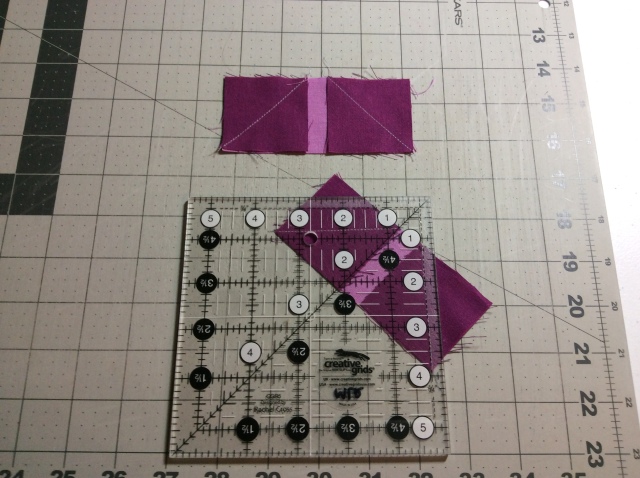
Next you will sew the middle part of the center subunit square. Sew one of the 1 1/2″ by 2″ Iris rectangles to the 1 1/2″ by 1 5/8″ Sky rectangle. Sew the other Iris rectangle to the other side of the Sky rectangle. Press both seams open. Assemble the center subunit square as shown below and sew the three sections together.

Petal Units
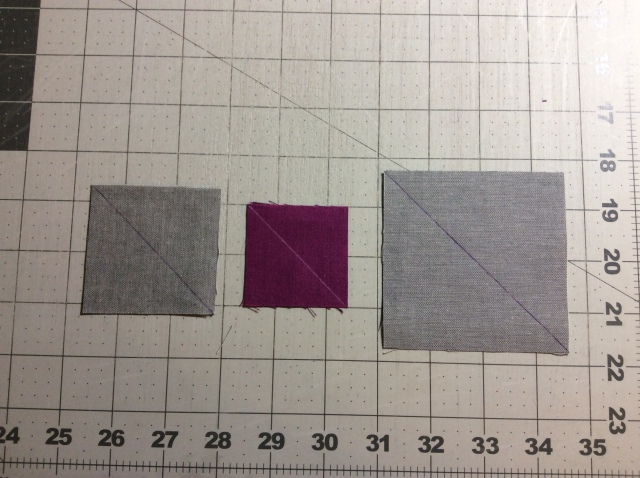
Place a 2 1/2″ Shadow square on the right corner of a 4 1/2″ Iris square and sew on the diagonal line. (I actually usually start sewing the corners on the left side, but for some reason, I started with the right corner. It really doesn’t matter). Trim 1/4″ from the sewn seam and press open. Then place a 2 1/2″ Shadow square on the left corner of the 4 1/2″ Iris square and sew on the diagonal line. Trim and press open. Repeat with other 4 1/2″ Iris square and the two 4 1/2″ squares.

Leaf Units (Corner Squares)
Each leaf unit (corner square) is made from two 2 1/2″ Amazon/Shadow half-square triangles (HSTs), one 2 1/2″ Shadow square and one 2 1/2″ Amazon square.
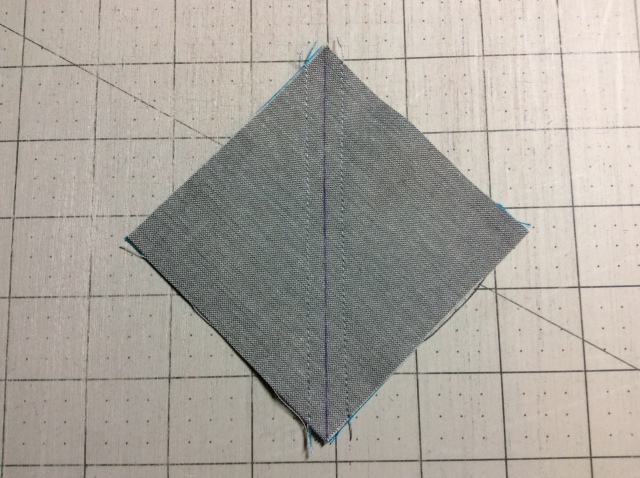
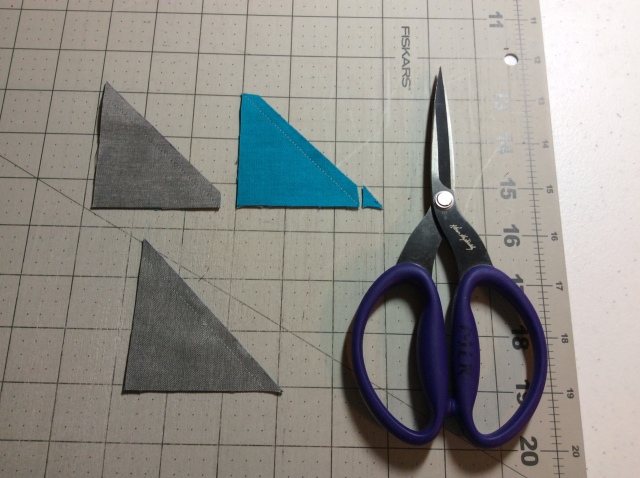
To make the HSTs, Place one 3 1/2″ Shadow square with the marked diagonal line on top of one 3 1/2″ Amazon square. Sew a seam 1/4″ away from each side of the line (see below). Repeat with the other 3 1/2″ Shadow and Amazon squares.
Cut each square into two triangles along the marked diagonal line. You will have eight triangles that need to be trimmed to 2 1/2″ triangles. I like the Quilt in a Day Ruler, but feel free to use the ruler/method of your choice.

A drawback to the Quilt in a Day Ruler is that there are still dog ears to be dealt with after trimming and before pressing, but I easily cut them off with my large but very sharp Karen Kay Buckley scissors. Press open.
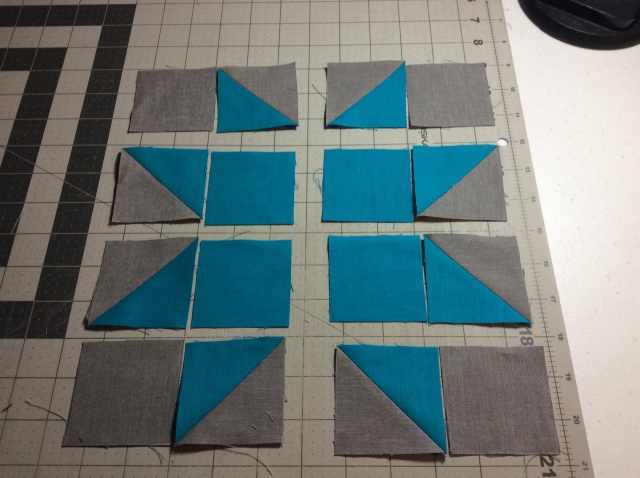
Following the photo below, pair a solid square with a HST. Even though I generally press my seams open, I pressed rows 1 and 3 to the left, and rows 2 and 4 to the right, so I could nest my seams. Then complete each corner leaf unit by sewing each set of pairs together.

Assembling the Block
Use the photo below for reference. For the top and bottom rows, sew a leaf corner unit to a Lilac petal unit, and then sew another leaf corner unit to the other side of the Lilac petal unit. Press seams toward the Lilac petal units. For the middle row, sew an Iris petal unit to either side of the center unit making sure that the Iris colored are lined up. Press seams toward the Iris petal units. Then sew the top row to the middle row, and middle row to the bottom row. Press these seams open to reduce the bulk. And your block is now completed.

Mockups
I created two different mockups of what a quilt might look like made from my Berry Blossom block using Quiltography which is an iPad app that cost about $15. It definitely is not as comprehensive as EQ7, but I rarely use a regular computer much any more except at work. I could not get the tiny Sky square in the center of the block to be any smaller, so the mockups are a little out of proportion.


Please click on the links below to see the wonderful blocks made by Cheryl and the other bloggers in our group:
- Cheryl@Meadow Mist Designs
- Jennifer@The Inquiring Quilter
- Sarah@123 Quilt
- Leanne@Devoted Quilter
- Jen@Patterns by Jen
- Jennifer@RV Quilting
- Amanda@Quiltologie
- Sharon@Yellow Cat Quilt Designs
- Jen@Dream and A Stitch
- Jen@Faith and Fabric
- Carole@Carole Lyles Shaw
- Stephanie@Quilt’n Party
- Susan@Sevenoaks Street Quilts
- Katrin@Now What Puppilalla
- Amista@Hilltop Custom Designs
- Nicole@Handwrought Quilts
- Marla@Penny Lane Quilts
- Silvia@A Stranger View
- Sarah@Smiles Too Loudly
- Carrie@The zen quilter
- Velda@GRANNYcanQUILT


That is a very cute block! I am glad you thought it up. It has tonnes of potential =)
LikeLike
Wonderful instructions, and heaps of fab photos. Looking good!!!
LikeLike
What a great block! And these fabrics were perfect for your block! Thanks for the tutorialI’m not familiar with Quiltography, will check that out!
LikeLike
So dainty, very nice!
LikeLike
Your block is great!
LikeLike
Love all the headers between sections. Very appealing. Too bad I’m not a quilter, tutorial seems easy to follow!
LikeLike
This is such a fun block! Well done!
LikeLike
Very pretty block and great tutorial. Thumbs up!
LikeLike
The colors work so well for this block, and I really like the layout where every other block is rotated. Lovely design, Mary, and thanks so much for joining the hop!
LikeLike
Pingback: 2016 Cloud9 new block blog hop | penny lane quilts
So pretty! I love the layout with the rotated blocks as well, it’s got a lot of movement. You did an amazing job!
LikeLike
Lovely, like a flower.So pretty, and a great tutorial too.
Smiles
Kate
LikeLike
This is a great block! I love the flower look and the tutorial is very nice and clear.
LikeLike
This block looks beautiful in these colors and your tutorial for its construction is great.
LikeLike
this is a fun and pretty block
LikeLike
Pingback: Cloud 9 New Block Blog Hop | Dizzy Quilter
Great block and tutorial! I especially like the second quilt mock up with the rotated block.
LikeLike
I love this block!!! It creates a wonderful secondry pattern!
LikeLike
Lovely block! I really like the layout where every other block is rotated too 🙂
LikeLike
Pingback: Cloud9 New Block Blog Hop – handwroughtquilts
It’s a beautiful block Mary, and a great tutorial.
LikeLike
Golly, all these pretty blocks. So many blocks, so hard to choose!
LikeLike
I love it!
LikeLike
Really pretty block, and I love the mock ups. Nice job with the tutorial.
LikeLike
Pingback: 2016 Cloud9 new block blog hop {raspberry swirl quilt block tutorial} | Gypsy Moon Quilt Co.
Pingback: Cloud 9 New Block Blog Hop | The (not so) Dramatic Life
Your block is beautiful and your directions look very easy to follow. Thanks!
LikeLike
Really lovely block here Mary with great clear instructions – well done!
LikeLike
Mary I just love what you did with the block 🙂 The colors are so fun and lovely and the solids make it such a crisp shape. Thanks so much for sharing it with all of us.
LikeLike
What a lovely name for this block! And I love the boldness of the design – thanks for sharing!
LikeLike
Your block is sooo sweet and the quilt layout is gorgeous! Lovely work!
LikeLike
Pingback: Tu-Na Quilts: Presenting Anne’s Flower | Tu-Na Quilts, Travels, and Eats
Great block! It looks wonderful in those fabrics!
LikeLike
Your block is lovely! It will make a wonderful quilt.
LikeLike
I love your block, especially in the alternating setting version. I could totally see a scrappy version of this, or a variety of flower colors with green leaves. So versatile!
LikeLike
This is a really super sweet block! Nice design and well-written tutorial. I could see myself making this one. After completing my block for this hop, I have a new appreciation for pattern designers. Thanks for sharing.
LikeLike
Pingback: September 2016 Blocks | Quilting is in my Blood
Pingback: 2017 Quilting Goals | Quilting is in my Blood