
Today I am entering my Quilt Label Tutorial in the Fall 2018 Tips and Tutorials Festival hosted by Yvonne@Quilting Jetgirl and Cheryl@ Meadow Mist Designs. Since I started quilting four years ago, I have attached labels to most of my quilts, but some of them have been an eyesore on the back of the quilt. Awhile back I ran across Pat Sloans Triangle Label Tutorial and modified it to use with Ink Jet Fabric Sheets. I like the look of these labels and think they provide a place for information about the quilt in a relatively subtle manner. I’m still refining this process, but today I’m going to share what I have learned so far about making triangular ink jet labels.
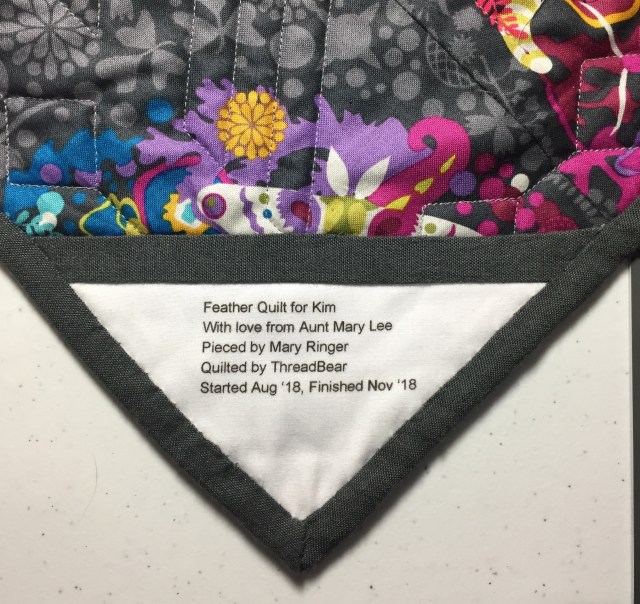
The quilt label above is for a quilt I just finished today which I will blog about soon. Below I have outlined the steps to make a label similar to mine:
- First you need to figure out what you want to type on the label. Sometimes I center my text, but I find I can fit more information when my text is left-aligned as above.
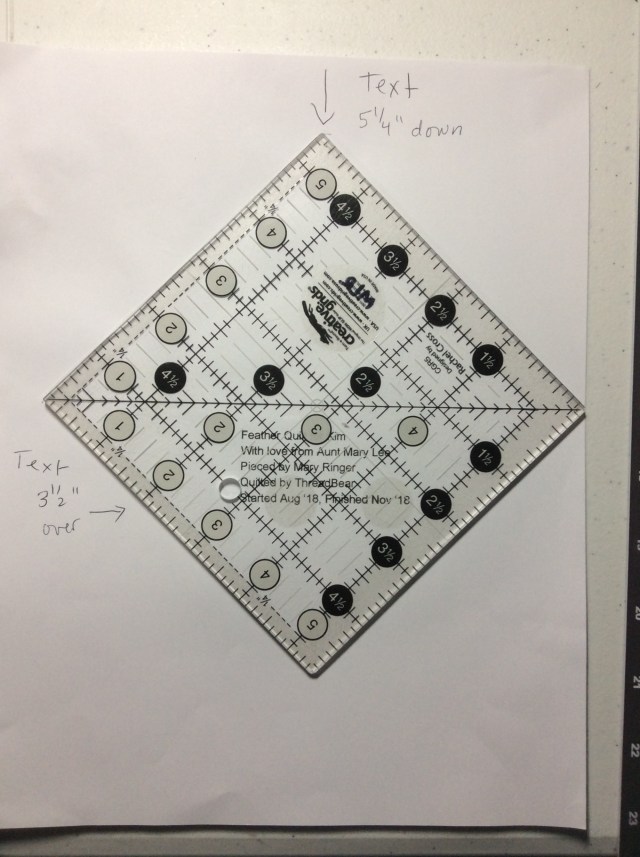
- Using some kind of word processing program (I used Google Docs), press the Enter key on the keyboard of your computer several times until you are a little over 5” down and then tab over about 3 1/2”. Then type in the info for your label, keeping about a 2 1/2” right margin.
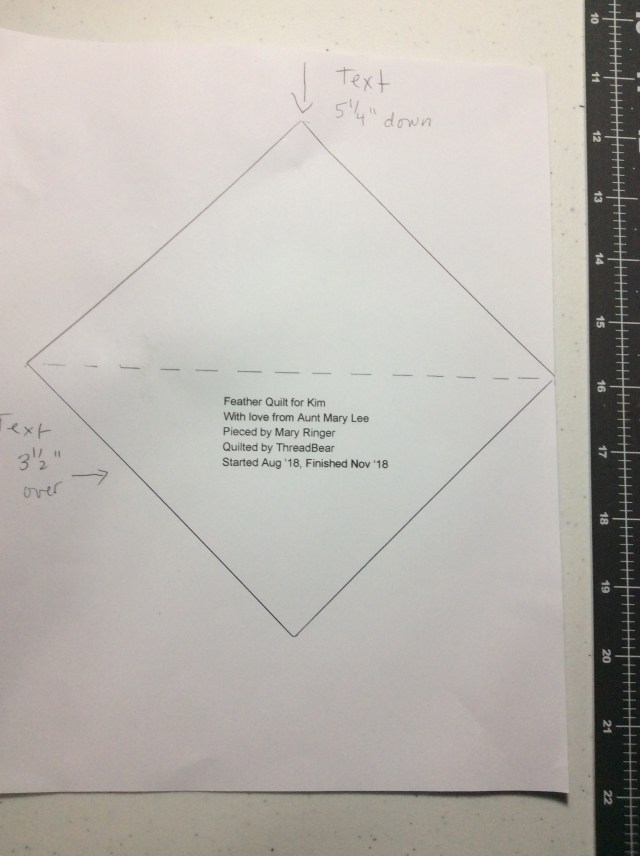
- I recommend printing a practice label on regular printer paper, and then place a 5 1/2” ruler “on point” with the black diagonal line even with the top line of text with some space between the text and the diagonal line. Try to center the exact middle of the ruler (depicted with two crossing white lines with a circle in the exact center) with the center of the longest line of text. Trace all around the ruler, but you don’t need to include the dotted line I drew in the second photo below. I drew it to show the fold line.
If the paper label looks good, print the label using an Inkjet Fabric Sheet. To keep the ink from smearing when washing the quilt, spray the label with Scotchguard Fabric protector. I let the label dry overnight or at least a few hours.
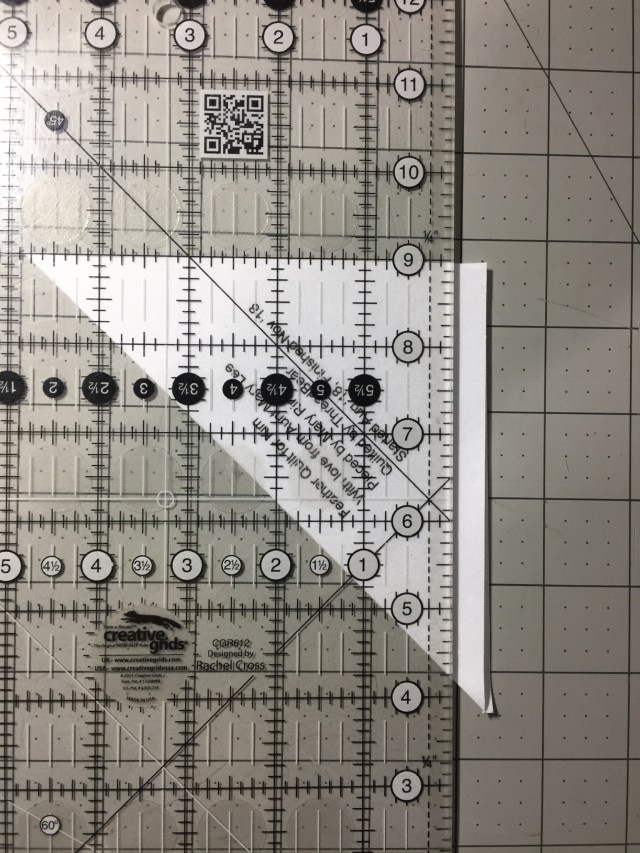
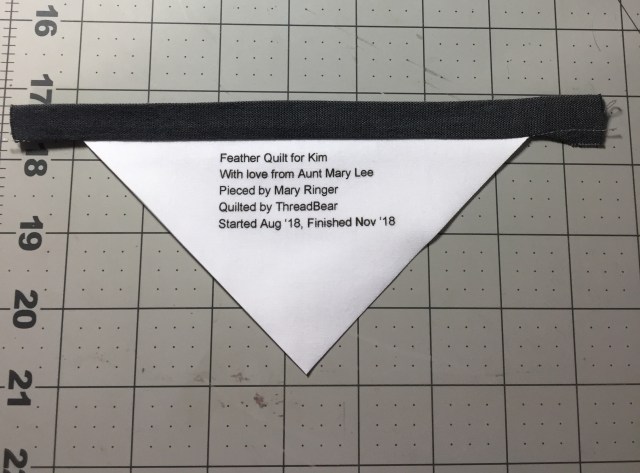
After the label is dry, I peel off the waxy paper on the back, and the trace my 5 1/2” ruler on point as I did on the practice paper label and use my rotary cutter to trim the label to a diamond shape. I fold the label in half, and usually it is slightly uneven:

I then trim each side of the label at least 3/8” from the edge of the text on each side of the label:
Sometimes I just sew the plain white triangle on my quilt, but it looks nicer with a border sewn to the top of the label. Below is how I finished the label for my Feathers quilt:
- Cut a strip of fabric at least 1 1/4” by 8 1/4”. I like to use the same fabric that I used for the binding.
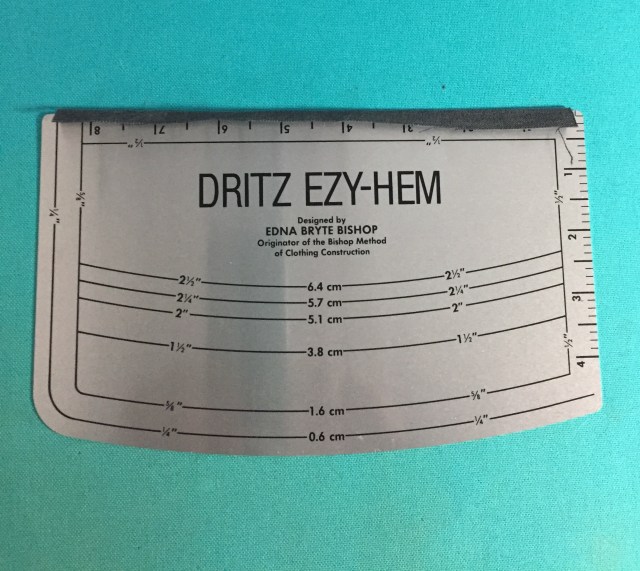
- Fold over the edge 3/8” and press down the fold. I prefer using the Clover Hot Ruler, but the Dritz EZY-HEM ruler has a clearer marking for 3/8”, so that’s what I used when making the top border for this quilt label. Be forewarned. The metal ruler below can get very HOT when using it to press a folded edge!
Next I trimmed the strip with the folded edge to 3/4”:

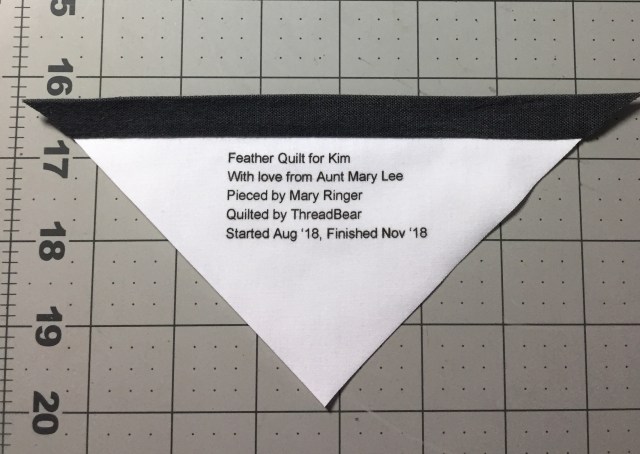
I then applied a little bit of glue with a glue stick and centered the raw edge of the strip pictured above on the top of the white triangle label (with the folded side up), using a couple pins to ensure the strips stayed put, and sewed the strip to the label using a 1/4” seam (sorry, I forgot to take a photo of this step). Below is a pic of the label with the strip sewn on:
I then trimmed the ends of the strip off even with triangle:
I used a combination of glue and pins to secure the label to the back of the quilt (again no photo!). Below is a pic of the label after I machine-stitched the binding onto the back of the quilt.
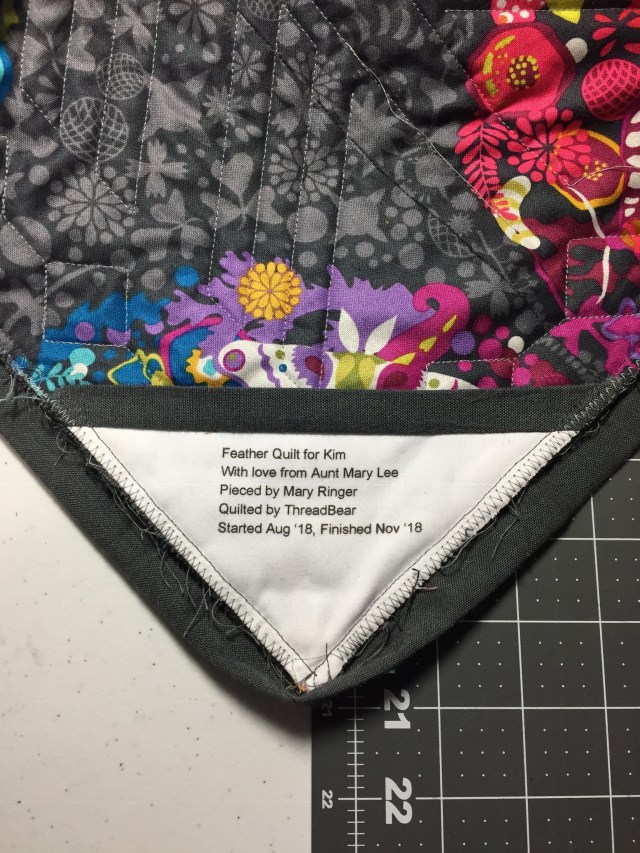
Before I start hand-stitching the binding to the front of my quilt, I always hand-stitch the border on the top of the label to the back of the quilt. If I were to try machine-stitching my binding on both the back and front of the quilt, I would sew a border on all three sides of the white triangle label.
Linking up to Fall 2018 Tips and Tutorials Festival: Other Sewn Or Quilted Item Tutorials Section. There are already some great tutorials posted. Let’s go check them out!


What a great tutorial, Mary, and I especially appreciate the tip about protecting the ink with Scotchguard Fabric protector! Thank you so much for sharing what you have learned and linking up with the festival. 🙂
LikeLike
Fabulous!!!! I am going to go PIN this right now. I haven’t been making labels, and I know I should be. Excellent tutorial. Happy Tuesday! ~smile~ Roseanne
LikeLike
Pingback: Feathers Quilt Finished! | Quilting is in my Blood
Pingback: Random Intention Baby Quilt Finished! | Quilting is in my Blood