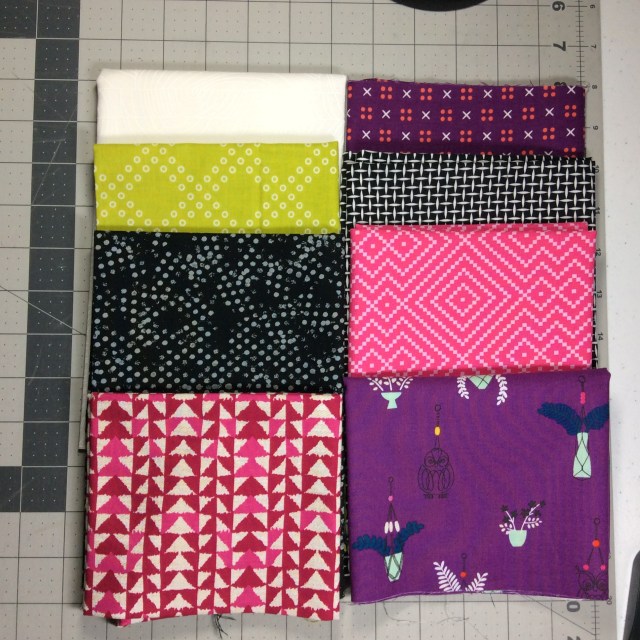
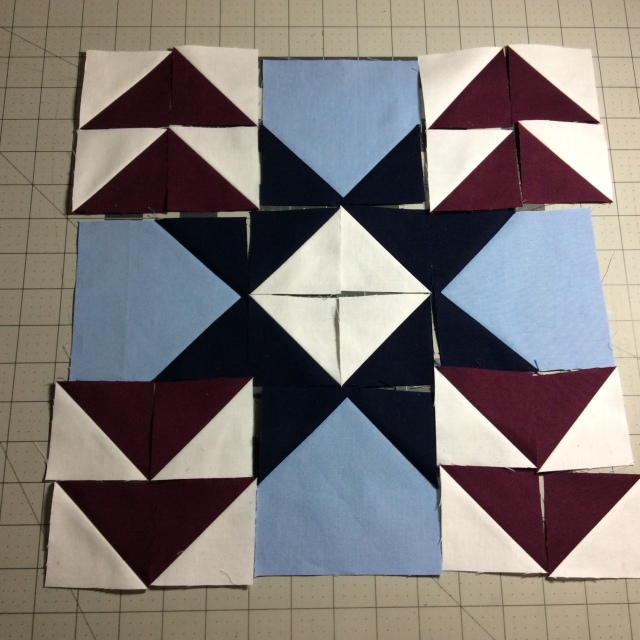
I’m excited to be participating in the 2016 Paintbrush Studio New Block Blog Hop. Paintbrush Studio generously supplied each participant with a fat quarter bundle from their new line of solids, Painter’s Palette. Our hosts, Yvonne@Quilting Jetgirl, Cheryl@Meadow Mist Designs, and Stephanie@Late Night Quilter curated the Ocean Sunrise Palette, and for the 12 1/2″ block that I designed, I used the following colors: Midnight, Daydream, White, and Bordeaux. I named my block, Midnight Starfish. I’m in the first group with Yvonne as our leader launching the blog hop on 3/28/16. Cheryl’s group will post on 3/29/16, and Stephanie’s group will finish the blog hop on 3/30/16. I can’t wait to see all the amazing blocks designed with the Ocean Sunrise Palette from Paintbrush Studio complete with tutorials. Without further ado, allow me to show you my Midnight Starfish block:
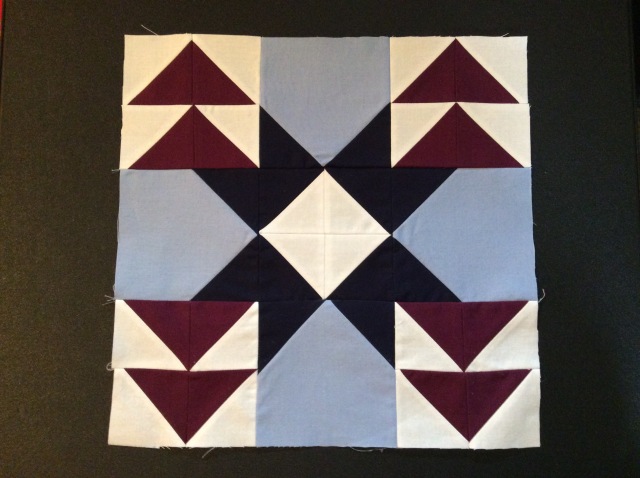
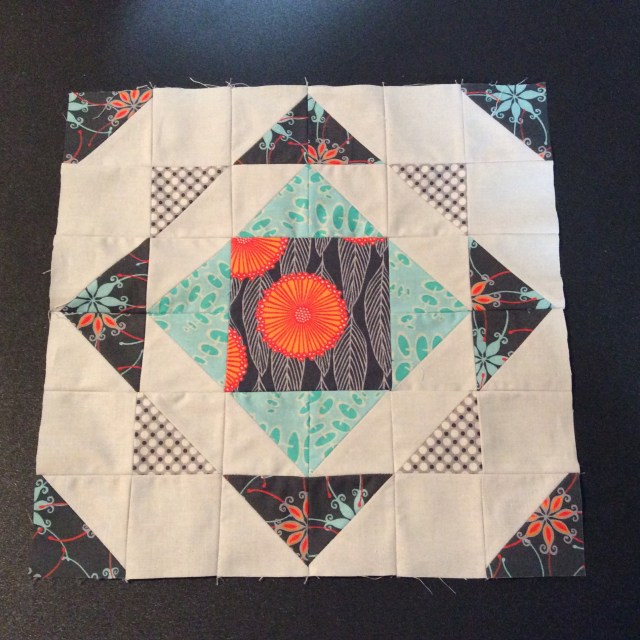
Midnight Starfish Block by Mary Ringer@Quilting is in my Blood
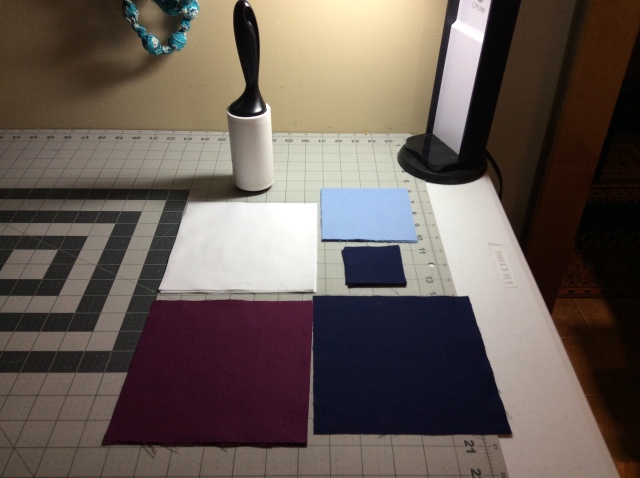
In order to make this block, cut the following quantities/measurements:
- three 6 1/2″ squares from the White fabric
- two 6 1/2″ squares from the Bordeaux fabric
- one 6 1/2″ square from the Midnight (dark blue) fabric
- eight 2 1/2″ squares from the Midnight fabric
- four 4 1/2″ squares from the Daydream (light blue) fabric
You might want to keep your lint roller handy! The white fabric picks up threads from the darker fabrics like my black pants attract hair from my cats!
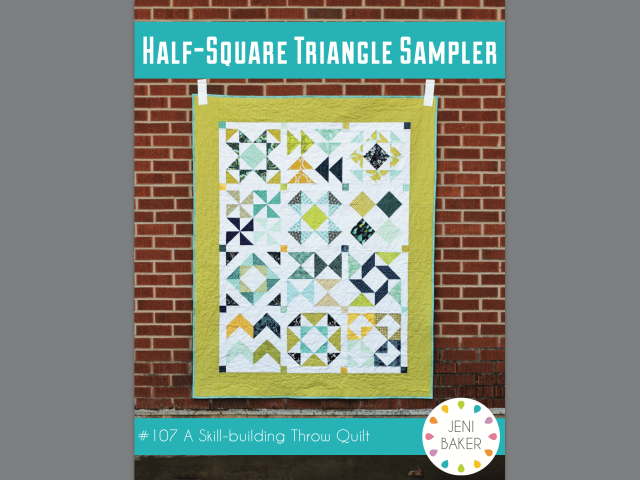
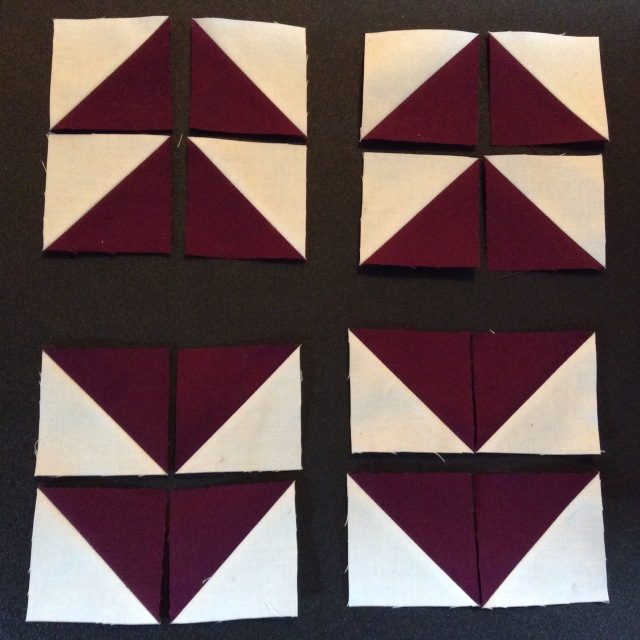
You’ll be making 16 Half-Square Triangles (HSTs) with the White/Bordeaux fabric and 8 HSTs with the White/Midnight fabric. Now, some of you are looking at the photo above, and saying “I only see four White/Midnight HSTs.” Very astute of you, that is true. But I am such a fan of the Eight-at-a-time method to make HSTs that I learned from Jeni Baker at QuiltCon, that having four extra HSTs is preferable to making the HSTs one at time. And I don’t like the four-at-a-time method for making HSTS. I just don’t like all those bias edges. I don’t need any help with my blocks being unintentionally wonky!
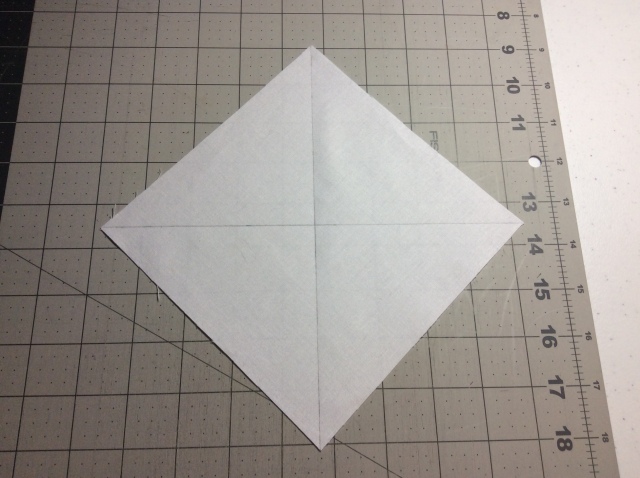
On the white squares that you cut, draw two diagonal lines from corner to corner. On white fabric, I prefer to use a mechanical pencil.
And while you’re in the drawing mood, draw one line from corner to corner on the small Midnight squares. Sometimes I start drawing the lines in the middle to get a smoother line.
Pin the 6 1/2″ white squares to two 6 1/2″ Bordeaux squares and one 6 1/2″ Midnight square. Sew a quarter-inch on each side of both drawn diagonal lines.

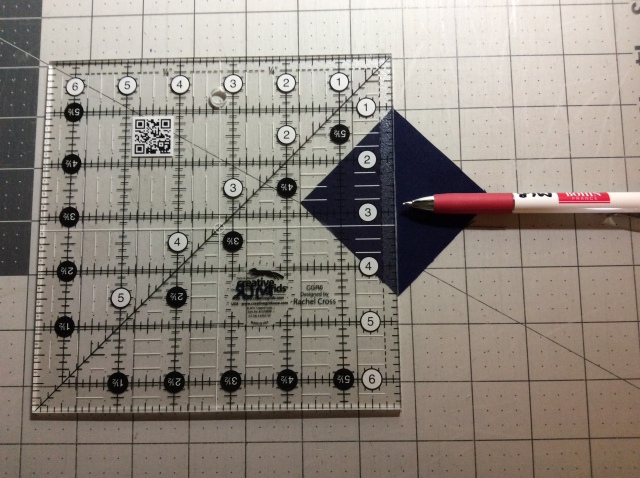
The next step is tricky. You will cut the sewn squares into fourths but not on the diagonal. See the next two photos:

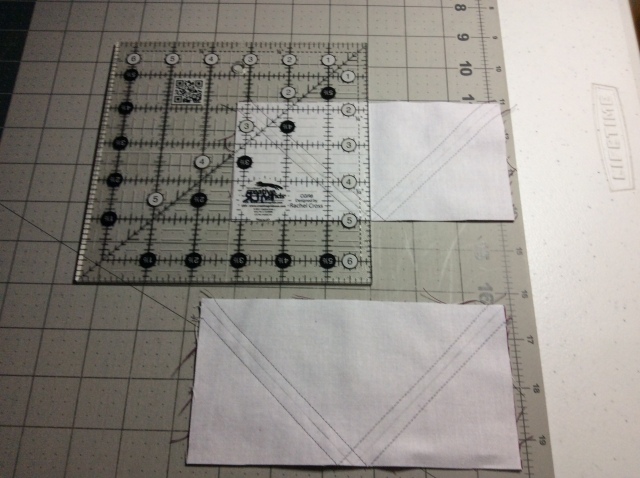
Next cut the squares on the drawn line into triangles:
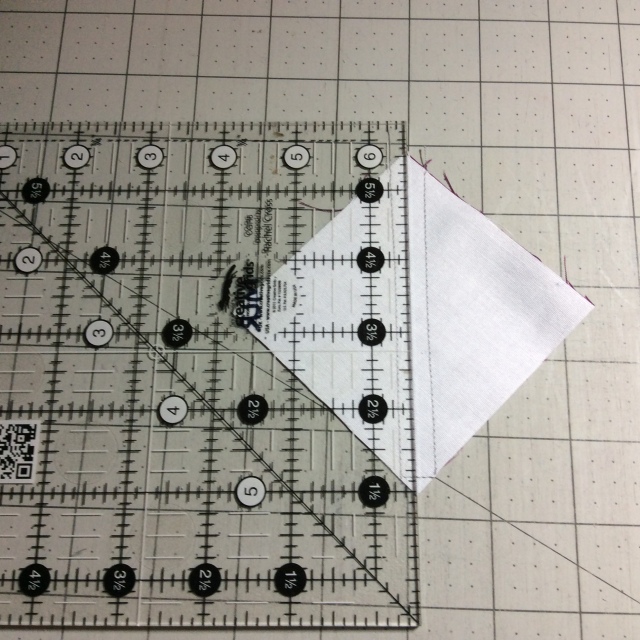
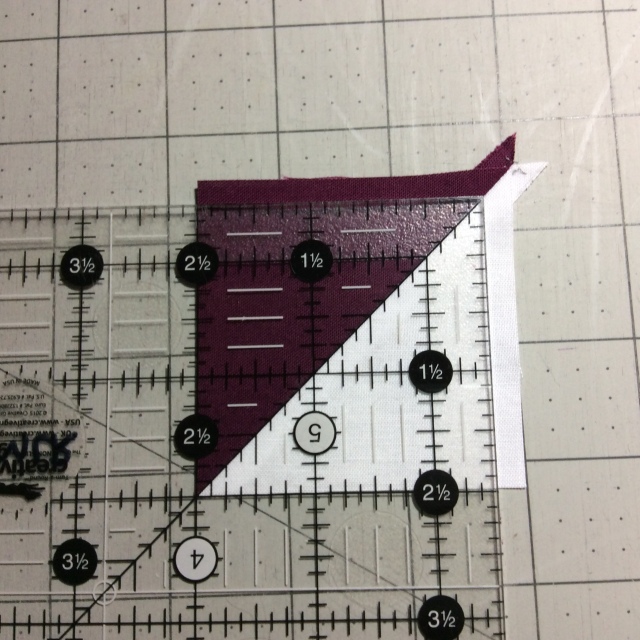
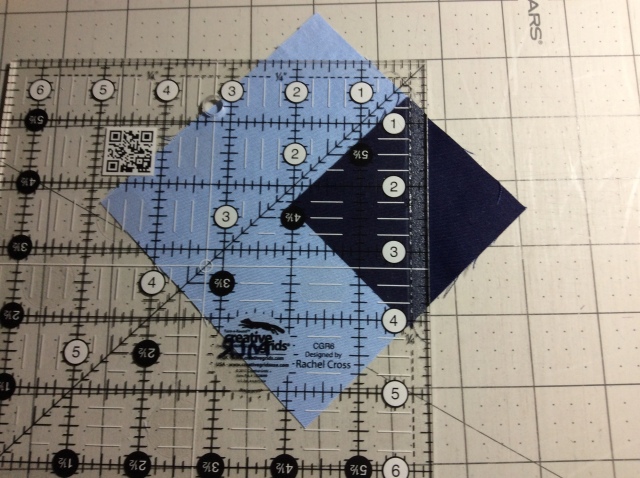
Press the seams open. Trim the HSTs down to 2 1/2″ lining up the diagonal line of the ruler with the 2 1/2″ mark of the ruler on two sides of the HST and then rotating 180 degrees and cut the other two sides of each HST. You will end up with 16 White/Bordeaux HSTs and 8 White/Midnight HSTs. Remember you will only need four of the White/Midnight HSTs.
Next sew one of the 2 1/2″ Midnight squares to the right corner of the 4 1/2″ Daydream square sewing slightly toward the outer corner just to the right of the drawn line. Repeat with the other three Daydream squares.
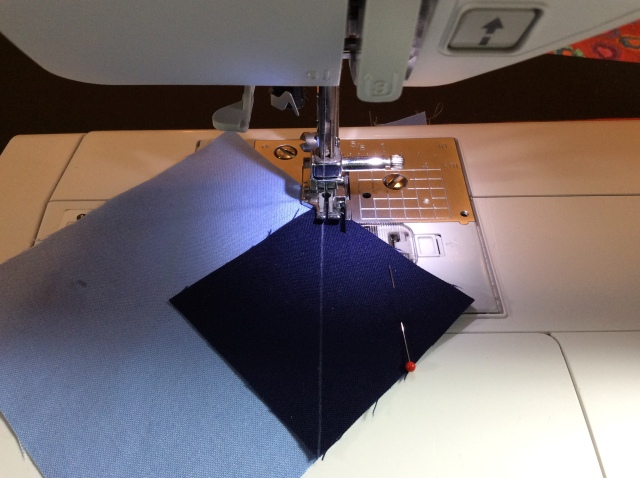
Trim the seam one-quarter inch:
Then fold over the Midnight triangle and press. Sew the other 2 1/2″ Midnight square on the left corner, slightly overlapping in the middle. This time sew just to the left of the drawn line. Repeat with the other three Daydream squares, and trim and press as above.
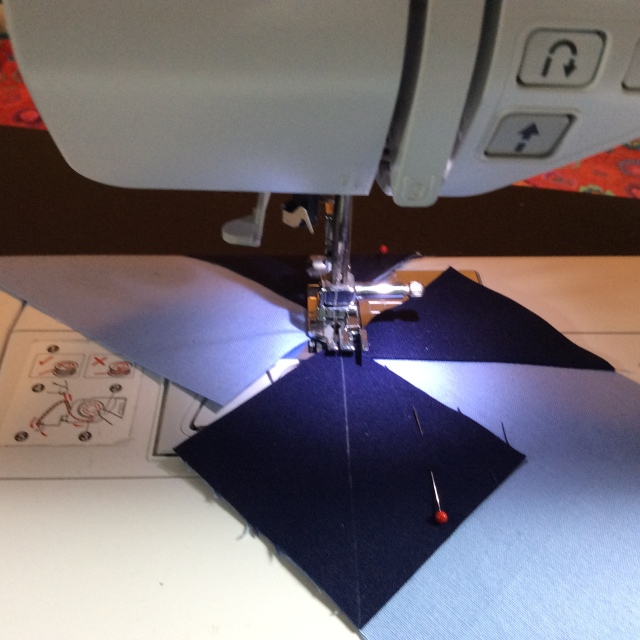
Lay out your HSTs with the Daydream squares with Midnight corners:
Using a quarter-inch seam, sew each pair of White/Bordeaux HSTs together pressing open, and then sew each of the pairs to another set of pairs with the points of triangle facing up in the top row and facing down in the bottom row, again pressing open to avoid show-through of the Bordeaux fabric under the white fabric. These units should measure 4 1/2″ square.
Sew the White/Midnight HSTs together as above facing the white parts inward to form a diamond. Then sew the three squares together for each row, and finally sew the three rows together matching seams and points as much as possible. Press open. Trim the completed block to 12 1/2″ as needed.

I have to say that the seams and points matched better in the practice block I sewed from my stash last weekend! This is not a super complicated block design, but I tried sewing this block twice today, and I never got it quite the way I wanted it. As I told a friend today, some days we have our Sewjo and other days, we don’t. I also told her that other quilters would totally understand. Right???
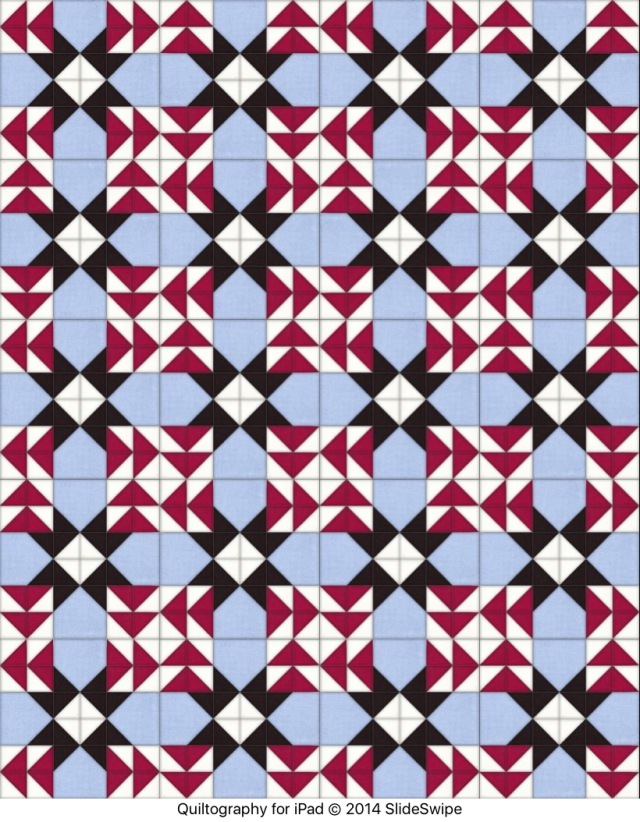
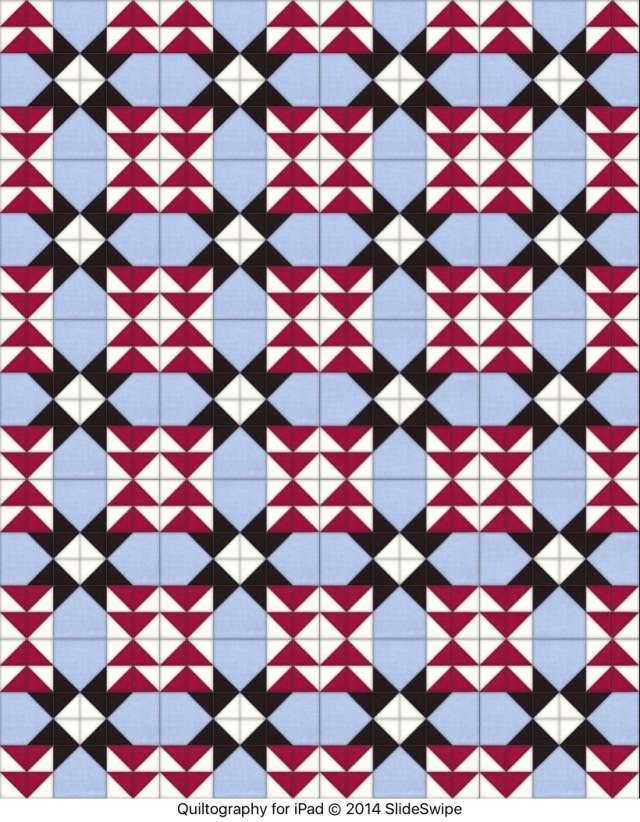
Many of you use EQ7. I’ve never even seen the computer program, but recently I did play with an app on my iPad called Quiltography, and I was able to create two layouts using my Midnight Starfish block that show two different secondary designs:
Be sure to check out all the other wonderful block tutorials being posted today by: